Android OSのオープンソースプロジェクト
https://source.android.com/必要なハードウェアスペックを準備。環境は以下。Ubuntuは18.04までしか情報がないですが、18.04だと常時CPUが異常加熱する問題が起きたのでやむを得ず最新版を使用。
| CPU | HDD | RAM | OS | |
| 要求スペック | 64bit | 400GB | 16GB | Ubuntu LTS |
| 使用環境 Inspiron 15 5000 (5502) | Intel Core i7 64bit 2.8GHz x8 | 1.1TB | 15.6GB | Ubuntu 20.04.2 |
必要なパッケージをインストールします。
$ sudo apt-get install git-core gnupg flex bison build-essential zip curl zlib1g-dev gcc-multilib g++-multilib libc6-dev-i386 lib32ncurses5-dev x11proto-core-dev libx11-dev lib32z1-dev libgl1-mesa-dev libxml2-utils xsltproc unzip fontconfig libncurses5 libncurses5-devudev rulesの設定のため、android-sdk-platform-tools-commonパッケージをインストールします。
$ sudo apt-get install android-sdk-platform-tools-commonPythonをインストールします。
$ sudo apt-get install pythonRepoのインストールをします。
$ mkdir ~/bin
$ PATH=~/bin:$PATH
$ curl https://storage.googleapis.com/git-repo-downloads/repo > ~/bin/repo
$ chmod a+x ~/bin/repoRepoにてダウンロードします。計150GBくらいで、47分かかりました。
$ git config --global user.name YourName
$ git config --global user.email you@example.com
$ cd ~/aosp
$ repo init -u https://android.googlesource.com/platform/manifest
$ repo syncビルドします。aosp_*をターゲットにしてemulatorを起動できるような説明がありますが、できませんでした。CuttleFishも起動できず。
sdk_phone_x86_64-userdebugをターゲットとします。-jNオプションで並列処理数を絞らないとcode 137でビルドがFailしました。指定なしだとシステムに合った数を自動で選択することになってますが、実際にはエラーを起こすので合っておらず、自分でエラーを起こさない数まで下げていくしかありません。-j8にて5時間20分かかりました。
$ source build/envsetup.sh
$ lunch sdk_phone_x86_64-userdebug
$ m -j8emulator起動する。
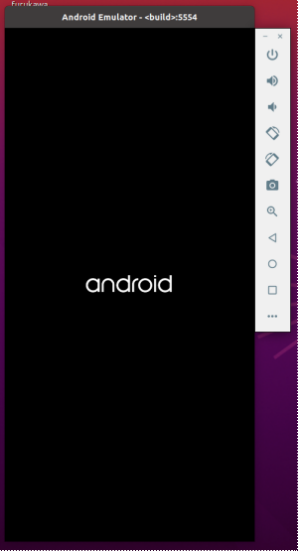
$ emulator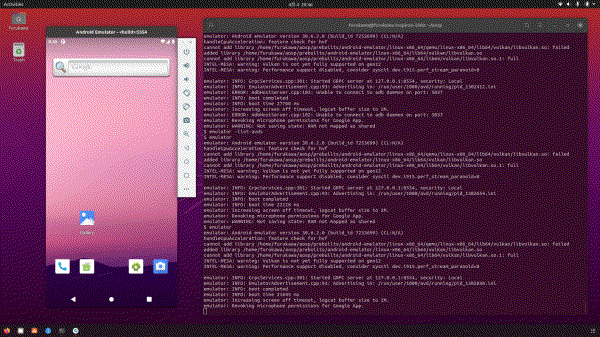
androidのブートアニメーションを変更してみる。
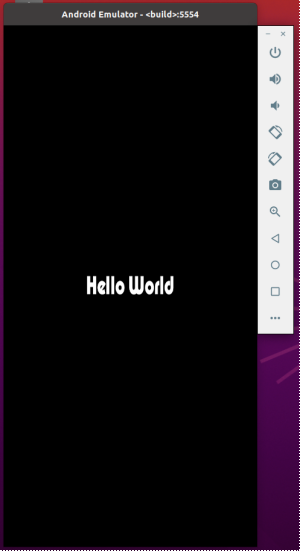
Hello Worldの画像(hello-logo-mask.png)を作成してリソースディレクトリに入れる。
$ cd ~/aosp/frameworks/base/core/res/assets/images/
$ ls -1
android-logo-mask.png
android-logo-shine.png
clock_font.png
progress_font.png
hello-logo-mask.png
ブートアニメーションのファイル参照を新規画像に差し替える。
$ cd ~/aosp/frameworks/base/cmds/bootanimation
$ vi BootAnimation.cpp
bool BootAnimation::android() {
SLOGD("%sAnimationShownTiming start time: %" PRId64 "ms", mShuttingDown ? "Shutdown" : "Boot",
elapsedRealtime());
// initTexture(&mAndroid[0], mAssets, "images/android-logo-mask.png");
initTexture(&mAndroid[0], mAssets, "images/hello-logo-mask.png");
initTexture(&mAndroid[1], mAssets, "images/android-logo-shine.png");ブートアニメーションが変わる。
| オリジナル | Hello World |
platform/frameworks/base/core/res/res/下のコンフィグファイルを見ると、Mobile Country Code (MCC)が404(India)、405(India)、450(Korea)、440(Japan)に「config_camera_sound_forced」が設定されています。
<!-- Whether camera shutter sound is forced or not  (country specific). -->
<bool name="config_camera_sound_forced">true</bool>
挙動の確認のため、全ての音量をゼロにするアプリを作成します。Android Studioでempty activityのプロジェクトを作成し、onStart()に全音量ゼロにしてから音量を取得、表示させるだけのコードを入れます。
    @Override
    protected void onStart() {
        super.onStart();
        AudioManager audio = (AudioManager) getSystemService(Context.AUDIO_SERVICE);
        String err="";
        try {
            audio.setStreamVolume(AudioManager.STREAM_ALARM, 0, 0);
        }catch (Exception e){
            err=err+"alarm error";
        }
        try {
            audio.setStreamVolume(AudioManager.STREAM_DTMF,0,0);
        }catch (Exception e){
            err=err+"dtmf error";
        }
        try {
            audio.setStreamVolume(AudioManager.STREAM_MUSIC,0,0);
        }catch (Exception e){
            err=err+"music error";
        }
        try {
            audio.setStreamVolume(AudioManager.STREAM_NOTIFICATION,0,0);
        }catch (Exception e){
            err=err+"notification error";
        }
        try {
            audio.setStreamVolume(AudioManager.STREAM_SYSTEM,0,0);
        }catch (Exception e){
            err=err+"system error";
        }
        try {
            audio.setStreamVolume(AudioManager.STREAM_RING,0,AudioManager.FLAG_VIBRATE|AudioManager.FLAG_REMOVE_SOUND_AND_VIBRATE);
        }catch (Exception e) {
            err = err + "ring error";
        }
        try {
            audio.setStreamVolume(6,0,0);
        }catch (Exception e) {
            err = err + "bluetooth_sco error";
        }
        try {
            audio.setStreamVolume(7,0,0);
        }catch (Exception e) {
            err = err + "enforce error";
        }
        try {
            audio.setStreamVolume(9,0,0);
        }catch (Exception e) {
            err = err + "text_to_speech error";
        }
        if(err.length()>1){
            Toast toast = Toast.makeText(getApplicationContext(), err, Toast.LENGTH_LONG);
            toast.show();
        }else {
            Toast toast = Toast.makeText(getApplicationContext(), "success", Toast.LENGTH_LONG);
            toast.show();
        }
        int val_ring=audio.getStreamVolume(AudioManager.STREAM_RING);
        TextView tv1 = findViewById(R.id.ring_val);
        tv1.setText(Integer.toString(val_ring));
        int val_music=audio.getStreamVolume(AudioManager.STREAM_MUSIC);
        TextView tv2 = findViewById(R.id.music_val);
        tv2.setText(Integer.toString(val_music));
        int val_alarm=audio.getStreamVolume(AudioManager.STREAM_ALARM);
        TextView tv3 = findViewById(R.id.alarm_val);
        tv3.setText(Integer.toString(val_alarm));
        int val_noti=audio.getStreamVolume(AudioManager.STREAM_NOTIFICATION);
        TextView tv4 = findViewById(R.id.notification_val);
        tv4.setText(Integer.toString(val_noti));
        int val_voice=audio.getStreamVolume(AudioManager.STREAM_VOICE_CALL);
        TextView tv5 = findViewById(R.id.voice_val);
        tv5.setText(Integer.toString(val_voice));
        int val_system=audio.getStreamVolume(AudioManager.STREAM_SYSTEM);
        TextView tv6 = findViewById(R.id.system_val);
        tv6.setText(Integer.toString(val_system));
        int val_force=audio.getStreamVolume(7);
        TextView tv7 = findViewById(R.id.enforce_val);
        tv7.setText(Integer.toString(val_force));
        int val_dtmf=audio.getStreamVolume(AudioManager.STREAM_DTMF);
        TextView tv8 = findViewById(R.id.dial_val);
        tv8.setText(Integer.toString(val_dtmf));
        int val_bt=audio.getStreamVolume(6);
        TextView tv9 = findViewById(R.id.bt_val);
        tv9.setText(Integer.toString(val_bt));
        int val_tts=audio.getStreamVolume(9);
        TextView tv10 = findViewById(R.id.speech_val);
        tv10.setText(Integer.toString(val_tts));
        int val_access=audio.getStreamVolume(AudioManager.STREAM_ACCESSIBILITY);
        TextView tv11 = findViewById(R.id.accessibility_val);
        tv11.setText(Integer.toString(val_access));
}<?xml version="1.0" encoding="utf-8"?>
<androidx.constraintlayout.widget.ConstraintLayout xmlns:android="http://schemas.android.com/apk/res/android"
xmlns:app="http://schemas.android.com/apk/res-auto"
xmlns:tools="http://schemas.android.com/tools"
android:layout_width="match_parent"
android:layout_height="match_parent"
tools:context=".MainActivity">
<LinearLayout
android:layout_width="match_parent"
android:layout_height="match_parent"
android:gravity="center"
android:orientation="horizontal"
tools:layout_editor_absoluteX="151dp"
tools:layout_editor_absoluteY="60dp">
<TextView
android:id="@+id/ring_val"
android:layout_width="48px"
android:layout_height="wrap_content"
android:gravity="center_vertical"
android:text="0"
android:textStyle="bold" />
<TextView
android:id="@+id/music_val"
android:layout_width="48px"
android:layout_height="wrap_content"
android:gravity="center_vertical"
android:text="0"
android:textStyle="bold" />
<TextView
android:id="@+id/alarm_val"
android:layout_width="48px"
android:layout_height="wrap_content"
android:gravity="center_vertical"
android:text="0"
android:textStyle="bold" />
<TextView
android:id="@+id/notification_val"
android:layout_width="48px"
android:layout_height="wrap_content"
android:gravity="center_vertical"
android:text="0"
android:textStyle="bold" />
<TextView
android:id="@+id/voice_val"
android:layout_width="48px"
android:layout_height="wrap_content"
android:gravity="center_vertical"
android:text="0"
android:textStyle="bold" />
<TextView
android:id="@+id/system_val"
android:layout_width="48px"
android:layout_height="wrap_content"
android:gravity="center_vertical"
android:text="0"
android:textStyle="bold" />
<TextView
android:id="@+id/enforce_val"
android:layout_width="48px"
android:layout_height="wrap_content"
android:gravity="center_vertical"
android:text="0"
android:textStyle="bold" />
<TextView
android:id="@+id/dial_val"
android:layout_width="48px"
android:layout_height="wrap_content"
android:gravity="center_vertical"
android:text="0"
android:textStyle="bold" />
<TextView
android:id="@+id/bt_val"
android:layout_width="48px"
android:layout_height="wrap_content"
android:gravity="center_vertical"
android:text="0"
android:textStyle="bold" />
<TextView
android:id="@+id/speech_val"
android:layout_width="48px"
android:layout_height="wrap_content"
android:gravity="center_vertical"
android:text="0"
android:textStyle="bold" />
<TextView
android:id="@+id/accessibility_val"
android:layout_width="48px"
android:layout_height="wrap_content"
android:gravity="center_vertical"
android:text="0"
android:textStyle="bold" />
</LinearLayout>
</androidx.constraintlayout.widget.ConstraintLayout>ビルドしたapkファイルをadbでインストールします。
$ source build/envsetup.sh
$ lunch sdk_phone_x86_64-userdebug
$ adb install app-debug.apk
emulator上でアプリを実行します。音量の並びはRing / Music / Alarm / Notification / Voice_Call / System / Enforce / DTMF / TextToSpeech / Bluetooth / Accessibility。
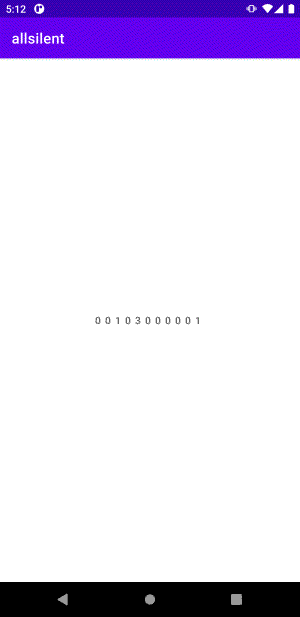
Android9(Pie)からSTREAM_ALARMのMIN_STREAM_VOLUMEが0でなく1になったようで、Alarm、Voice_Call、Accessibilityがゼロになりませんが、内蔵カメラアプリで使われるSTREAM_SYSTEM_ENFORCEDはゼロになっています。この状態で撮影するとシャッター音は鳴りません。
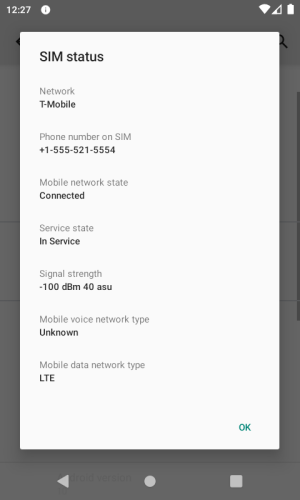
android11-releaseをビルドして、エミュレータのMCCを調べます。MCC=310(アメリカ合衆国)、MNC=260(T-Mobile)になっています。
$ adb shell
emulator_x86_64:/ $ getprop | grep numeric
[gsm.operator.numeric]: [310260]
[gsm.sim.operator.numeric]: [310260]
emulatorでもSIMカード情報を確認します。T-Mobileと表示されます。
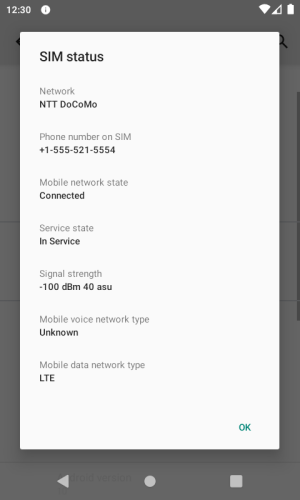
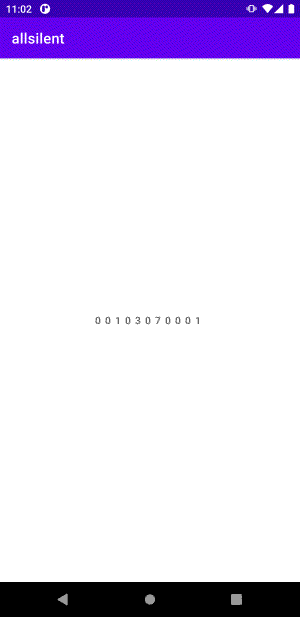
external/qemu/android/android-emu/android/telephony/modem.cのSIMカード情報を日本のNTT DoCoMoに変更して再度ビルドし、emulator上でアプリを実行します。STREAM_SYSTEM_ENFORCEDが最大の7のままで変更できなくなっています。内蔵のカメラアプリで撮影するとシャッター音が鳴ります。(シャッター音の属性にFLAG_AUDIBILITY_ENFORCEDを指定しない場合や、そもそもシャッター音を鳴らさないカメラアプリで鳴ることはありません。)

注意 ここに記載の内容を実行するとデータもアプリも設定も全部消えます。失敗すると元のOSに戻せなくなる可能性もあります。
Google Pixel4aにAOSP OSを書き込みます。デバイスドライバのバイナリイメージが公開されていない機種では同じことは出来ません。また、工場出荷状態の全バイナリイメージが公開されていない機種の場合、成功しても失敗しても元に戻せなくなります。開発者向けオプションで、USBデバッグに加えてOEMロック解除をONにします。有効にするには再起動。
https://source.android.com/setup/start/build-numbers#source-code-tags-and-buildsの中からタグを選び、ソースをダウンロードします。
$ repo init -u https://android.googlesource.com/platform/manifest -b android-11.0.0_r38
$ repo synchttps://developers.google.com/android/driversのGoogle、Qualcommの各Vendorドライバをダウンロードして、AOSPのrootディレクトリで解凍します。vendorディレクトリの下に解凍されます。
ビルドし、Fastboot modeにします。
$ source build/envsetup.sh
$ lunch aosp_sunfish-userdebug
$ m -j8
$ adb reboot bootloader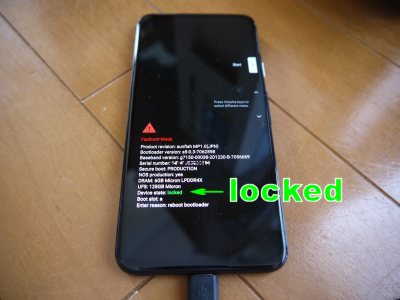
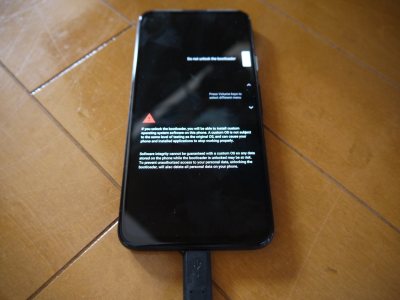
BootloaderをUnlockします。
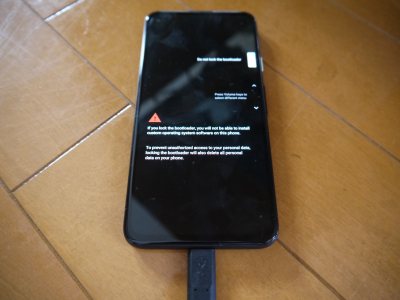
$ fastboot flashing unlock音量ボタンでUnlockする方を選び、電源ボタンでUnlock実行。
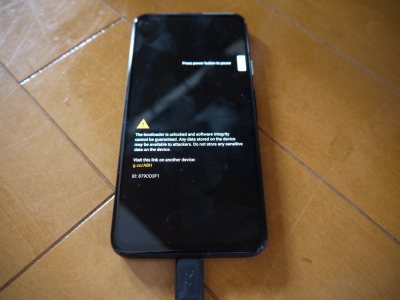
再起動してunlock状態である警告が出る。
再度Fastboot modeにします。
$ adb reboot bootloader
OSを書き込む。OSだけ入れ替わるわけではなく、設定やデータを含めて全て消えます。
$ fastboot flashall -wこの後lockしてしまうと、OSは起動しなくなります。メーカー純正のOSはメーカーのみが知る秘密鍵によるRSA暗号で署名されており、lockすると、公開鍵で復号できない署名の場合は不正なOSと判断され起動しません。
起動しなくなった場合、電源ON直後に音量Downボタンを押しながら電源ボタンを押して、Fastboot modeに入れます。ここでRescue modeとかRecovery modeとかを選択できますが、選択してもそのようなモードにはならず、OSが起動できない状態で停止します。
この状態ではadbコマンドも使えませんが、USB接続は可能で、Fastboot modeにてfastbootコマンドは使用できますので、コマンドでunlockすれば元に戻ります。
$ fastboot flashing unlocklockしても使えるようにするには、avb_custom_keyパーティションに公開鍵を書き込みます。AOSPのビルドではexternal/avb/test/data/testkey_rsa4096.pemが秘密鍵として使用されるので、以下のように公開鍵を作成して、書き込みます。
$ avbtool extract_public_key --key testkey_rsa4096.pem --output pkmd.bin
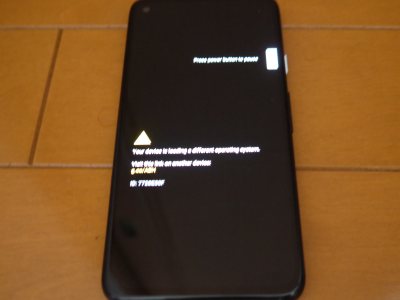
$ fastboot flash avb_custom_key pkmd.bin正規のOSではないという警告が出ますが、lock状態で起動できるようになります。
これで自由に改変可能なOSがlock状態でも起動できるようになったものの、Google Playはメーカーにライセンス供与されているものなので、無償のAOSP環境には含まれていませんでした。基本的にAndroidアプリは全てGoogle Playで管理されている状態なので、Google Play無しでは使い物にならない。
ということで元に戻します。
https://developers.google.com/android/imagesから対象のFactory ImageのLinkをダウンロードして解凍します。AOSPのときと同様にunlockしてから、解凍したファイルに含まれるflash-all.shを実行すれば出荷時のイメージファイルを書き込みます。
$ adb reboot bootloader
$ fastboot flashing unlock
$ ./flash-all.sh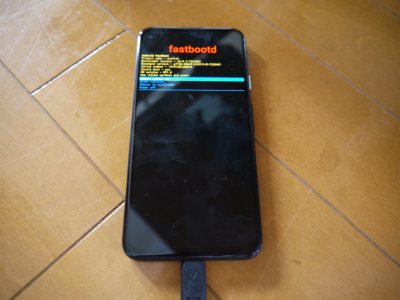
最後にlockします。
$ adb reboot bootloader
$ fastboot flashing lock
音量ボタンでlockする方を選び、電源ボタンでlock実行。